The first route to follow
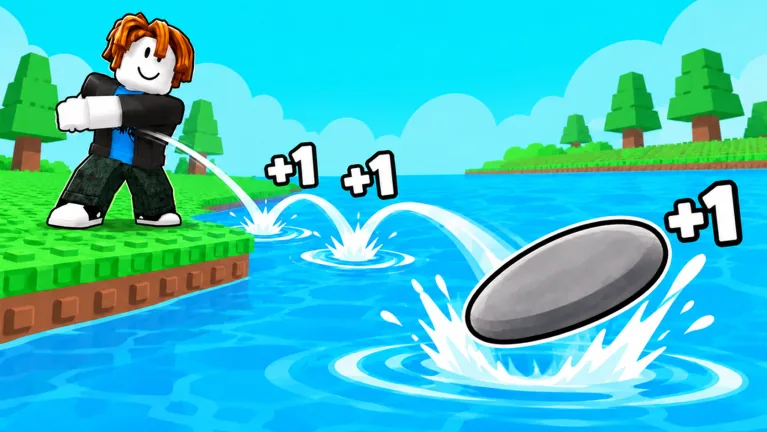
Throw a stone and collect Skill from its bounces. Train until your level rises and your throws travel farther, then aim for the next zone to earn more Wins. Before you spend those Wins, check the next stone or pet upgrade. That loop is enough to get started in +1 Stone Skipping. Each bounce gives +1 Skill before any boosts active in your session. You can make your first throw without opening every menu.
It is easy to stare at the distance number and ignore what moves it. Skill and training are what help you reach a farther zone. A new stone, a pet, or rebirth can change the next run, too. Read the requirement and price on the live panel before committing resources.
Read the screen before chasing upgrades
The bottom HUD shows Skill, Level and its progress bar, Wins, and a Friend Boost readout. Look at those after a few throws. If your Skill rises but your level does not, head back to the training area and follow the tutorial prompt. Some opening sessions show “Reach Level 20”; use the prompt on your own screen for your current goal.
| What you see | What it tells you to do next |
|---|---|
| More bounces and Skill | Keep throwing, then use the available training interaction. |
| Level progress increases | Continue the current training loop until throws reach farther. |
| A farther zone reached | Compare the Wins you earn there with your previous zone. |
| Wins accumulating | Inspect stones, eggs, and other visible upgrades before buying. |
| A rebirth requirement | Check its reset warning and multiplier before pressing the button. |
Do not use a boosted player’s floating Skill numbers as your starting rate. The base rule is +1 per bounce. A multiplier pad or timed boost can raise the number shown for another player. Your HUD tells you what your character actually earned.
Turn Skill into farther throws
Make several ordinary throws before buying the first offer you see. Watch one throw closely: count the bounces, note the Skill change, and read the distance when it ends. Repeat after training or leveling. Now you have a comparison for your own account, with your current boosts and equipped stone.
Training and levels help you throw farther, but there is no fixed distance formula to plan around. A before-and-after check is more useful than a guessed target number. If the tutorial banner gives you a level goal, finish it first. If a Skill pad is available, read its multiplier and unlock state. Stronger pads can show rebirth icons or a LOCKED label; simply standing on one does not unlock it.
Aim to reach the next zone consistently. One unusually long throw feels great, but repeated throws tell you whether an upgrade actually helped. Farther zones give more Wins. Check the reward displayed in your server instead of using a fixed payout chart.
Choose an upgrade with a purpose
Better stones and unusual throwables, pets with boosts, and rebirth are separate ways to progress. If your throws just miss the next zone, compare an affordable stone or pet with what you have equipped. If your level still rises quickly, another round of training may help sooner. When rebirth becomes available, read its warning: the visible rebirth panel says it resets Level and Skill. Be ready to train again.
Open the Stones and Pets menus to compare owned equipment with the next option. Egg stands and the My Pets panel include an Equip Best control. Read the current Wins cost, hatch odds, and pet stats on your screen before spending; those values can change. The Shop has optional offers, but the beginner route does not require a purchase.
Finish the current tutorial prompt first. Then check whether a free training or equip action improves your throw. Compare an affordable upgrade after that, and consider rebirth or a premium offer only when you understand what it changes. Your own progress is a better guide than another player’s purchased setup.
A short repeatable session plan
- Make three throws with the same stone. Note your typical distance, Skill gain, and farthest zone.
- Follow the tutorial or training prompt until the Level bar advances.
- Make three more throws and compare the zone reached. Keep the same stone for this comparison.
- Open Stones and Pets. Equip an owned improvement or save Wins for a clearly better choice.
- Check the next zone again. If progress stalls, inspect available multipliers and the rebirth requirement without assuming either is free or unlocked.
Change one thing at a time. If you equip a stone, hatch a pet, trigger a boost, and rebirth together, you will not know which change helped or why your Level returned to the beginning.
FAQ
What gives Skill in +1 Stone Skipping?
Each bounce gives +1 Skill under the base rule. Your active multipliers or timed boosts can change the number displayed during a session.
How do I earn more Wins?
Reach farther zones with longer throws. Check the zone reward in game, since the payout shown in your current server is what matters.
Should I rebirth immediately when it unlocks?
Read the requirement and reset warning first. The rebirth panel says Level and Skill reset, so be ready to train again.
Do I need a pet or a paid item to start?
No purchase is part of the basic throw, Skill, training, and zone loop. Review an owned pet or stone before spending Wins or Robux.
Why does another player gain more than one Skill per bounce?
Their multiplier pad, boost, or account setup may differ from yours. Compare your own HUD and boost indicators before judging your progress.